
Install Oracle 21c Linux
In this article, we are going to learn oracle 21c installation on the Linux platform step by step.
What is Oracle Database 21c?
Oracle 21c is the latest release of Oracle database software, if you want to read more about click here.
Can I download Oracle for free?
Yes, You can download the oracle 21c software for free from Oracle's official website.
Step 1. Oracle 21c Download software from oracle official website or Click Here

Step 2. Internet must be working on your machine, let's check it's working or not using the ping command.

If the ping google.com command is responding like above, that means the Internet is working on your machine.
Step 3. Check the IP Address and hostname of your machine.
#ifconfig
Check Hostname: If you don't know how to set hostname Click Here
#hostname
Step 4. Edit /etc/hosts file and add IP with hostname inside the hosts file.
#vi /etc/hosts
Step 5. Check preinstall repository details using the below command.
#yum list oracle-database-preinstall-21c
How to install 21c prerequisites
Step 6. Install prerequisites using the below command
#yum install oracle-database-preinstall-21c
Once prerequisites are completed, the ORACLE user and GROUPS are also created automatically. So, after the installation of prerequisites, you should change the password for the ORACLE user.
Step 7. Change the password for ORACLE USER.
#passwd oracleStep 8. Disable firewall and SELinux.
For SELinux:
#vi /etc/selinux/config
Apply changes immediately, no need to reboot the machine immediately.
#setenforce permissiveFor firewall:
#systemctl stop firewalld
#systemctl disable firewalld
Step 9. Create Oracle Home directory.
#mkdir -p /u01/app/oracle/product/21.0.0/dbhome_1
Step 10. Change ownership of /u01 directory and set 775 permissions for /u01 also.
#chown -R oracle.oinstall /u01
#chmod -R 775 /u01
Now switch in ORACLE user and unzip the ORACLE 21C database software
Step 11. Unzip the software inside the ORACLE HOME directory directly.
$unzip LINUX.X64_213000_db_home -d/u01/app/oracle/product/21.0.0/dbhome_1
Step 12. Go inside the ORACLE HOME directory, and start runInstallar.
$cd /u01/app/oracle/product/21.0.0/dbhome_1
$./runInstaller
Finally, Oracle 21c database installation on the Linux platform started now.
Step 13. Here we just installing the ORACLE 21c Database software so select the setup software-only option.

Select single instance:

Select Enterprise Edition option

Set Oracle Base directory

Select oraInventory directory

Check all Database Groups

Root scripts: If you want to auto-execute the Root scripts then set Root user Credential.

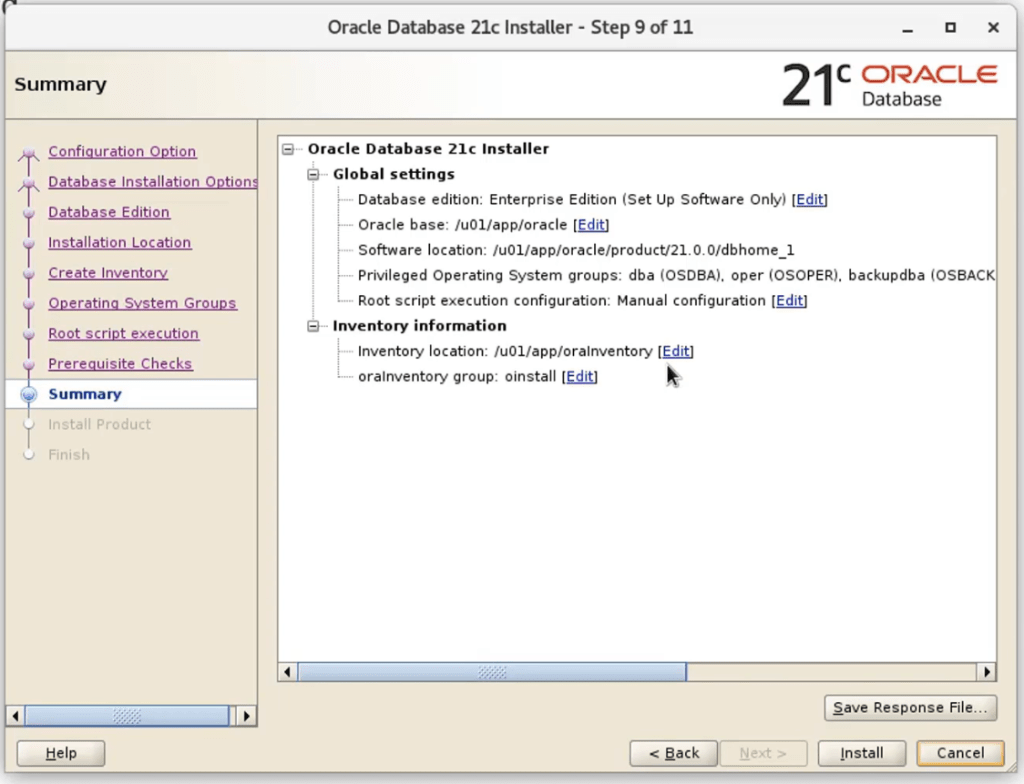
Save Response File just click on the save response file button for your future reference and then click on the Install button.
Now finally Oracle Installation process has been started.

Execute both scripts from the Root user.


Once done click on the OK button.
And Finally, the Oracle 21c installation successfully completed.

Set Oracle Environment variables
$vi .bash_profile

export ORACLE_BASE=/u01/app/oracle
export ORACLE_HOME=/u01/app/oracle/product/21.0.0/dbhome_1/
export PATH=/usr/sbin:$PATH
export PATH=$ORACLE_HOME/bin:$PATH
export LD_LIBRARY_PATH=$ORACLE_HOME/lib:/lib:/usr/lib
export CLASSPATH=$ORACLE_HOME/jlib:$ORACLE_HOME/rdbms/jlib
Thanks for reading, please visit again.
3 thoughts on “Oracle Database 21c Installation On Oracle Linux 7 | Oracle 21c Download”